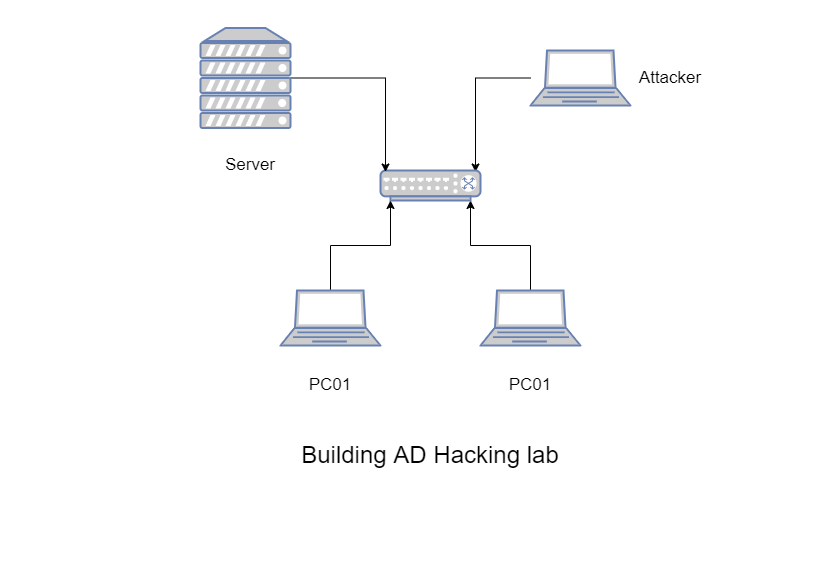
Hello, In this post we’ll set up Active Directory hacking lab. which will give you ability to train on different types of attacks.
Downloading required files and tools
It’s Recommended to have At least 16 GB RAM and around 60 GB Free Storage.
Minimum RAM you can give to your virtual machines is 2GB, if you’ll give it lower, you’ll end up with very slow lab.
I Have 32 GB of RAM, So I’m gonna give 4GB RAM to each VM
We gonna start with downloading and installing VMWare Workstation
Which you can get from here, VMWare Workstation comes with 30 Days free trial but there’s also free alternative called Virtual Box.
In this post we gonna use VMWare Workstation. You can use any tool you like, the concept is same.
Once you download, open setup file and just follow the installation, it’s really simple. and once you have it, we gonna download ISO Files for our Active Directory Lab. First One Will Be Windows Server 2019, Which you can get from here (Make Sure You’ll Select ISO), also we will need Windows 10 Enterprise, Which you can download from this link (ISO),
Setting Up Windows Server 2019
Once you have both files, we can start setting up virtual machines.
Open VMWare Workstation And Click “New Virtual Machine”
Type of configuration – Typical
Then Select “I Will Install the operating system later” because if you select ISO file now, I had issue installing OS.
On OS Selection, Select Microsoft Windows and on version Windows Server 2019
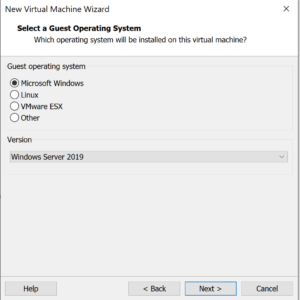
Then Click Next, After This keep the name as suggested.
Set Capacity of disk 60GB and select “Split virtual disk into multiple files”, click next and then Finish.
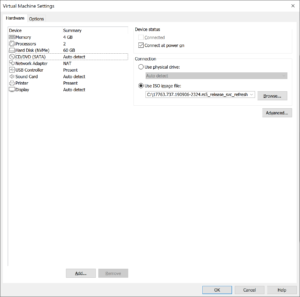
You should see Windows Server 2019 appear, click on it and press “Edit Virtual Machine Settings”, go in “Memory” and set memory amount you want to give to machine.
2GB is recommended, I’m gonna give it 4GB to make machine quicker, then go in “CD/DVD (Sata)” and press on
“Use ISO image file:” and select Windows Server’s ISO you downloaded. Make sure “Connected at power on” is checked like on image.
Now, you can press on “OK” and press on “Power On This Virtual Machine”.
Once you turn on machine, click on screen and press any key, to return to your machine, press CTRL+Alt.
Click on “Next”, and then “Install Now”.
Select “Windows Server 2019 Standard Evaluation (Desktop Experience)”, then click “Next”, Accept Terms
Click on “Custom: Install Windows Only (Advanced)”
Click On “New”, then Apply.
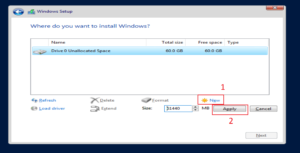
Then Click on “Next” And Wait for OS to Install.
Setting Up Active Directory Inside Windows Server
Once it’ll be done, Set Password on administrator user, I will use “Password1” as password.
and then login to your virtual machine, first of all we gonna rename virtual machine.
open search and search “pc name”, scroll down and click on “Rename This PC”, I’m Using “ATOM-DC”, click on “Restart Later”.
once you are done, open “Server Manager”, on top right side of it, you’ll see “Manage” Button, click it and then select “Add Roles and features”.
Click on Next on first three steps, once you reach “Server Roles” step, check “Active Directory Domain Service“, click “Add Features”, on rest of the steps we’ll keep default configuration, on final step, click install.
After install, reboot machine and log in once again.
Wait for “Server Manager” to turn on, after this you’ll see on top right side, Flag with warning icon, press on it and click “Promote this server to a domain controller”, select “Add a new forest” and enter domain name,
I’m going to use “HELIUM.local”, enter DSRM Password, I Will Use “Password1” Once More.
click next on rest of the steps and click install.
log in to server once again and open “Add roles and features”, Select “Active Directory Certificate Services”, click “Next” on first three steps, on “Server Roles” check “Certificate Authority”, and click on “Next” and on final step “Install”.
Click on flag with warning sign and click on “Configure Active Directory Certificate Services”.
Select role: “Certification Authority”, then “Enterprise CA”, then “Root CA” and “Create New Private Key”, click next on rest of the steps.
After this, restart your server and log in.
Setting Up Users inside Active Directory
Open Server Manager, on top right side click on tools and then “Active Directory Users and Computers”.
Go in “HELIUM.local” and then “Users”, Right click in there and create new user and Fill the info.
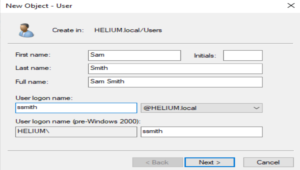
I’m gonna reuse password it’s really common thing and we can try “Pass The Password” or “Pass The Hash” Attacks.
from 4 checkboxes, make sure only “Password Never Expires” is selected.
Create one more user with different name, and you can reuse password, so we’ll have two new users.
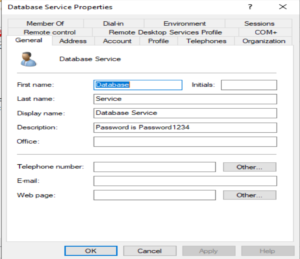
Now, we’re going to add one administrator user, set name to “Database Service” and logon name to “DBService”, I’m going to use password “Password1234”
Once user is created, right click on it and press properties, and I’ll enter “Password is Password1234”.
description of users can be seen by non-admin users and sometimes we might face cases like this.
now go in “Member of” Section and click on add button, and in field enter “Domain Admins” and press OK
now we need to create SPN (Service Principal Name), to do that open CMD with Administrator Privileges and run
setspn -a ATOM-DC/DBService.HELIUM.local:60111 HELIUM\DBService
After setting up SPN, we’ll be able to perform kerberoasting attack.
Setting up SMB
since the SMB protocol is common target, we are also going to set up SMB on our server.
to do that, go in local disk C:\ And Create folder There called “Share”.
Go in Server Manager and on left side of menu click “File And Storage Services”
Then Click on “Shares”, Then on “Tasks” And “New Share”.

Then Select “SMB Share – Quick”, Click on next and select “Type Custom Path”, Click on “Browse” And select folder we’ve just created and click on next until you finish setting up.
Creating Windows 10 machine.
On top left corner of VMWare, click on file and then New Virtual Machine.
Here’s Configuration Settings:
Configuration type: Typical.
Guest OS – Select ISO File For Windows 10.
Version of Windows to Install : Windows 10 Enterprise.
Full name: Proton.
Storage: 60GB.
Disk: Split into multiple files.
Increase RAM if you need.
Now Install windows 10 like we did it on Windows Server.
Once install will be done, you’ll be asked to setup windows, First thing will be to Select your region.
I always select “United States” There, Skip extra keyboard layout, and once you’ll be asked to enter account, on lower left corner click Domain Join Instead.
Once you do that, It’ll ask you to enter who’s going to use this PC, I’m going to write “Sam Smith” in there.
And Enter Password : “Password1”.
Setup Security Questions, Click No on activity history, Decline on assistant, Disable all features on privacy page and Wait for setup to finish.
Once done, open start menu and search “pc name”, and click on result and click on rename, I’m going to set name to “Proton”.
Reboot Machine And Then Login.
Joining Active Directory
Go Back in Windows Server machine, open CMD and enter “ipconfig”, Save IP of machine.
Go Back in Windows 10 Machine, and search in start menu “network status”.
- Click on Change Adapter Settings
- Double Click on ethernet0
- Properties
- Internet Protocol Version 4
- Use Following DNS Server addresses and enter Server’s IP.
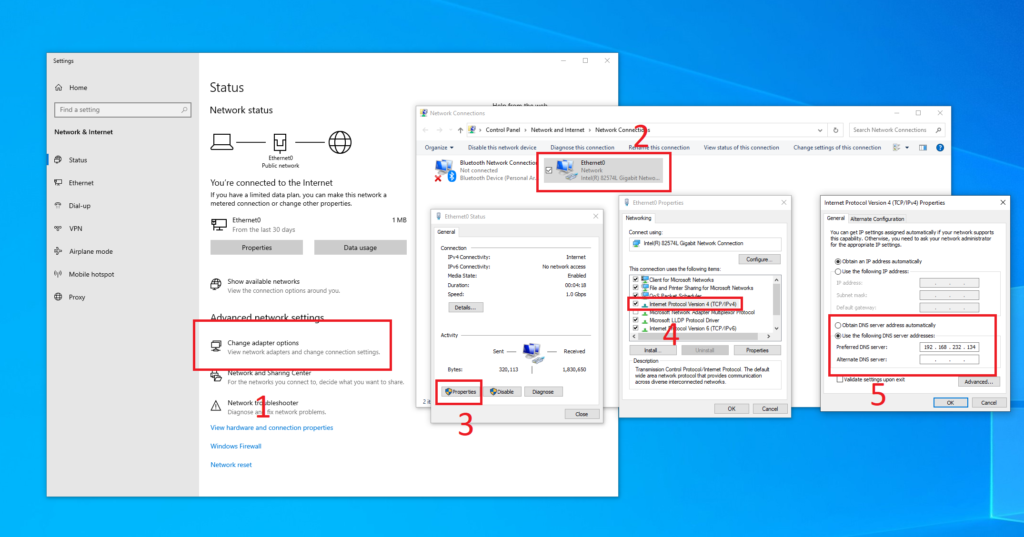
Then, Open start menu and search domain, click on result “Access work or school”.
Click on “Connect” and press “Join device to a local Active Directory domain”.
In domain name field enter “HELIUM.local”, in username enter “Administrator” and your administrator password on Server, In My Case it’s Password1, Skip next step and press reboot.
now, if you go back on Server, in computer’s you’ll see that Proton appeared there.
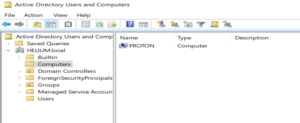
Now we gonna log in in Proton machine as administrator and we’ll do little bit of changes.
On login screen, when you are asked for password click on “Other User” and log in as administrator.
We gonna make user Sam Smith, Local Administrator on Proton machine.
Once you log in, open search and find “Computer Management”, Go in local users and groups, and then groups.
Double click on administrator, in field enter “ssmith” and press enter.
And Last step, go in file explorer in proton, and on right side click on network. press OK on warning.
then click on yellow line at top and click on turn on network discovery

once you do that, you’ll see ATOM-DC shares.
Optional Setep:
What you can do right now is to create another Windows 10 Machine so you’ll be able to set john smith as local administrator there, as i said, this step is optional and currently having only 2 machines in Active Directory where the one is domain controller is totally enough.
And now, we’ve finished setting up our hacking laboratory, using this lab you’ll be able to train on following attacking methods/Scenarios:
- Kerberoasting.
- Pass The Pass.
- Pass The Hash.
- Golden Tickets.
- PowerView/Bloodhound enumeration tools
- Credential Dumping in mimikatz.
And many other methods also, enjoy your active directory lab.
Happy Hacking.
